How To Get Cloudflare Worker Build Notifications On Discord
I recently created a higher-or-lower style guessing game about Steam games (you can play it at steamdle.xyz!), and deployed it using Cloudflare Workers. I wanted to find a way to set up status notifications for builds so I know when they succeed or fail. I almost always have Discord open, so I figured I would try setting things up using Webhooks. It works great, so I figured I’d share!
Architecture
The way this will work is we will use a Cloudflare Queue to subscribe to worker build events. Then, we will create a separate worker that subscribes to the queue. When that worker receives a message, it will parse it, create a Discord post, and publish it to the webhook — really simple.
Create A Discord Webhook
You’ll obviously need a Discord server, one that you have Admin privileges in.
In the server, go to the settings and navigate to the ‘Integrations’ tab.
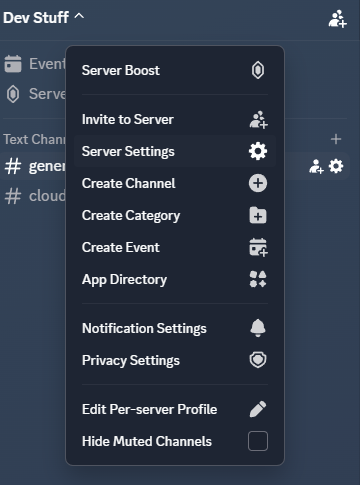
In the integrations menu, click on Webhooks > New Webhook. Discord will create a new default webhook. You can name it whatever you want, and here you’ll also choose what channel the messages will get sent to.
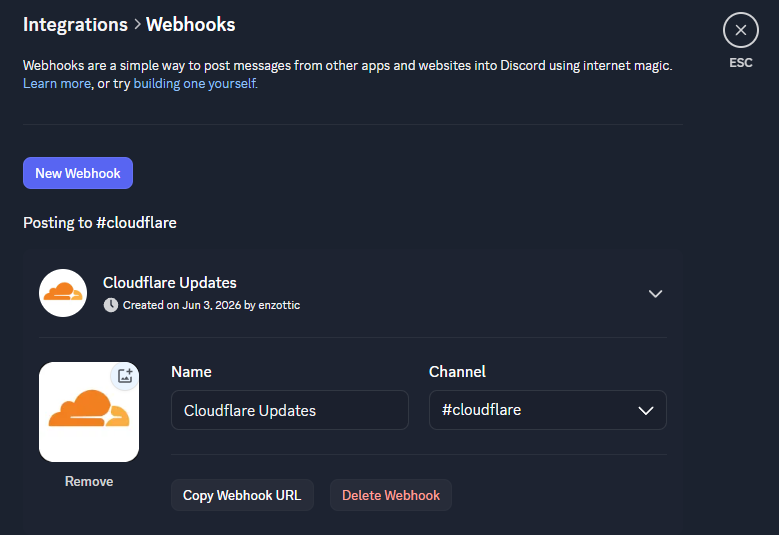
That’s it on Discord.
Create The Queue
- In the Cloudflare Dashboard, navigate to the Queues menu
- Create a new queue
- In the menu for the new queue, navigate to Subscriptions
- Create a new subscription, select the worker you want build notifications for, and select the event types you want. I just selected all of them.
Create The Forwarding Worker
Now we’ll create the worker that will listen for events coming through the queue.
- Navigate to the Workers menu
- Create a new application, use the ‘Hello World’ template for now
- Give the worker a name
- Hit deploy
Once deployed, we can edit the code by clicking the Edit code button in the top right. This will open a web version of VS Code.
First, we’ll update the handler to be the queue() function:
export default {
    async queue(batch, env) {
        for (const message of batch.messages) {
            try {
                await postToDiscord(env, message.body);
                message.ack();
            } catch (err) {
                console.error("Failed to notify Discord", err);
                message.retry();
            }
        }
    },
};
Each message will then get formatted as a post for the Discord webhook
async function postToDiscord(env, event) {
    const res = await fetch(env.DISCORD_WEBHOOK_URL, {
        method: "POST",
        headers: { "content-type": "application/json" },
        body: JSON.stringify(buildDiscordPayload(event)),
    });
    if (!res.ok && res.status !== 204) {
        throw new Error(`Discord webhook failed: ${res.status} ${await res.text()}`);
    }
}
For each event, we can define a dictionary to contain certain information we want to display about the event:
const STYLES = {
    "cf.workersBuilds.worker.build.started": { title: "🔧 Build started", color: 0x5865f2 },
    "cf.workersBuilds.worker.build.succeeded": { title: "✅ Build succeeded", color: 0x57f287 },
    "cf.workersBuilds.worker.build.failed": { title: "❌ Build failed", color: 0xed4245 },
    "cf.workersBuilds.worker.build.canceled": { title: "⚪ Build canceled", color: 0x99aab5 },
};
Finally, using those styles, we can construct the Discord webhook payload
function buildDiscordPayload(event) {
    const style = STYLES[event.type] ?? { title: event.type, color: 0x2b2d31 };
    const t = event.payload.buildTriggerMetadata ?? {};
    const shortSha = t.commitHash ? t.commitHash.slice(0, 7) : "unknown";
    const firstLine = (t.commitMessage ?? "").split("\n")[0];

    return {
        embeds: [
            {
                title: `${style.title} — ${event.source.workerName}`,
                color: style.color,
                fields: [
                    { name: "Branch", value: t.branch || "—", inline: true },
                    { name: "Commit", value: ``${shortSha}``, inline: true },
                    { name: "Author", value: t.author || "—", inline: true },
                    { name: "Message", value: firstLine || "—", inline: false },
                ],
                timestamp: event.metadata?.eventTimestamp,
                footer: { text: `${t.repoName ?? ""} • ${t.rootDirectory ?? ""}` },
            },
        ],
    };
}
The worker code references an environment variable named DISCORD_WEBHOOK_URL. To add this to the worker:
- Navigate back to the main worker page
- Go to the settings tab
- Under Variables and Secrets, press Add
- Set the name to
DISCORD_WEBHOOK_URL, the type toSecret, and paste in the webhook URL as the value
Connecting the Forwarding Worker to the Queue
Once the forwarding worker is deployed, and you’ve added the webhook environment variable, we can connect the forwarding worker to the queue so it can start processing messages
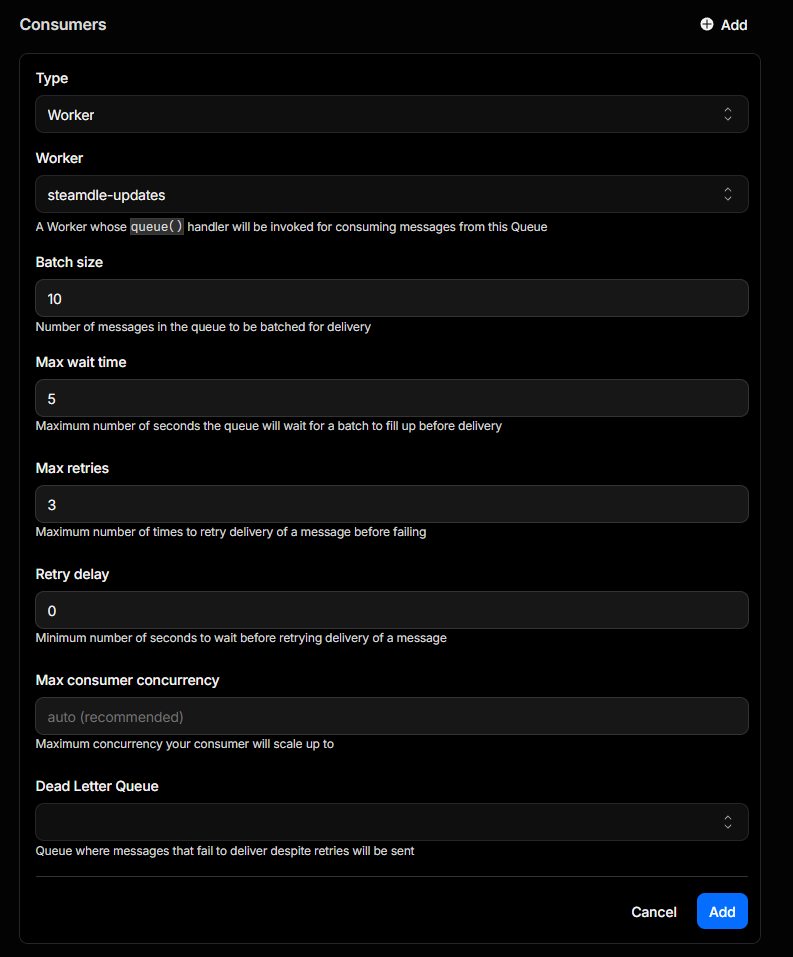
- Navigate to the Queue, and click the queue you created
- Click the settings tab
- In the ‘Consumers’ sub menu, click Add
- Here, you’ll select the worker you created
- Adjust the other settings if you want, but I did not.
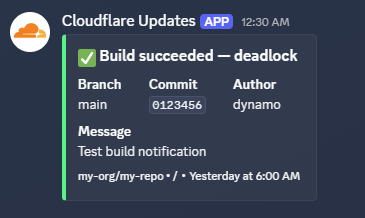
Once added, everything should be set up! To send a test message into the queue, head to the Messages tab of the queue. You can use this message to test that your worker is set up properly:
{
    "type": "cf.workersBuilds.worker.build.succeeded",
    "source": {
        "workerName": "deadlock"
    },
    "payload": {
        "buildTriggerMetadata": {
            "branch": "main",
            "commitHash": "0123456789abcdef0123456789abcdef01234567",
            "commitMessage": "Test build notification",
            "author": "dynamo",
            "repoName": "my-org/my-repo",
            "rootDirectory": "/"
        }
    },
    "metadata": {
        "eventTimestamp": "2026-06-03T12:00:00.000Z"
    }
}
And here is what the embed will look:
You can update the embed field in the forwarding worker to change the look of this embed.